Strong at Home: A Practical Guide to Bodyweight Exercise and Pushup Styles
By Refocused Health & Wellness | Educational Fitness Insight
Building strength does not require an expensive gym membership, complicated machines or a room full of equipment. A well-designed home exercise program can improve muscular strength, cardiovascular health, balance, mobility and everyday physical confidence.
The key is not finding the most extreme workout. It is choosing movements you can perform safely, progressing them gradually and training the entire body instead of repeatedly working one favorite muscle group.
Pushups are especially useful because they train the chest, shoulders, triceps and core simultaneously. But they should be one part of a balanced routine that also includes leg, hip, back, pulling and cardiovascular exercises.
Why home exercise works
The body responds to resistance whether that resistance comes from a barbell, exercise band, backpack or your own body weight.
Federal guidelines recommend that adults complete at least 150 minutes of moderate-intensity aerobic activity—or 75 minutes of vigorous activity—each week. Adults should also perform muscle-strengthening activities involving all major muscle groups on at least two days per week. Centers for Disease Control and Prevention
Only about one-quarter of American adults meet both the aerobic and muscle-strengthening recommendations. Lack of time, gym access and equipment are common barriers, which is why short home workouts can make a meaningful difference. Healthy People 2030
A productive home program should include five basic movement categories:
- Pushing
- Pulling
- Squatting or lunging
- Hip extension or hinging
- Core stabilization
Walking, jogging, jumping rope, dancing or stair climbing can supply the cardiovascular component.
The pushup: more than a chest exercise
A properly performed pushup primarily challenges the pectoral muscles of the chest, the anterior shoulders and the triceps. It also requires the abdominal, back, hip and leg muscles to stabilize the body.
That makes the pushup a moving plank as much as it is an upper-body exercise.
Research has found considerable activation of the chest, triceps and shoulder-stabilizing musculature during conventional pushups. Changing hand placement, body angle or stability changes the difficulty and muscular demands. PubMed
The goal is not simply to complete as many repetitions as possible. Ten controlled repetitions with proper alignment are more valuable than 30 rushed repetitions performed with a sagging back and incomplete range of motion.
How to perform a standard pushup
Begin in a high-plank position with your hands approximately shoulder-width apart or slightly wider. Place your fingers forward or turned outward only slightly.
Your head, shoulders, hips and heels should form one relatively straight line.
Before moving:
- Press your hands firmly into the floor.
- Brace your abdomen as if preparing for a light punch.
- Tighten your glutes and legs.
- Keep your head aligned with your spine.
- Avoid lifting your chin to reach the floor.
Bend your elbows and lower your chest under control. Your hips and chest should descend together. Keep the elbows angled somewhat back instead of allowing them to point directly sideways.
Lower only as far as you can while maintaining control and a comfortable shoulder position. Press the floor away, returning to the starting position without allowing the lower back to sag.
Exhale as you push up and inhale during the controlled descent. The American Council on Exercise provides additional instructions through its exercise library. ACE Fitness
Common pushup mistakes
Allowing the hips to sag
A dropping midsection often indicates that the core is fatigued or the variation is too difficult. Switch to an incline pushup and rebuild control.
Lifting the hips too high
This reduces the demand on the chest and changes the movement into an awkward pressing angle. Maintain a straight line from the shoulders through the hips.
Flaring the elbows aggressively
Elbows pointing straight out can create an uncomfortable shoulder position for some people. Keep them angled moderately toward the body and use the hand position that permits pain-free movement.
Leading with the head
Reaching the face toward the floor does not create a deeper pushup. Keep the neck neutral and lower the chest between the hands.
Performing partial repetitions too soon
Short repetitions may be useful in specific training plans, but beginners should first develop a controlled, comfortable range of motion using an easier variation.
Chasing numbers after form breaks
Once body alignment collapses, the productive portion of the set is over. Rest or move to an easier variation.
Ten useful pushup styles
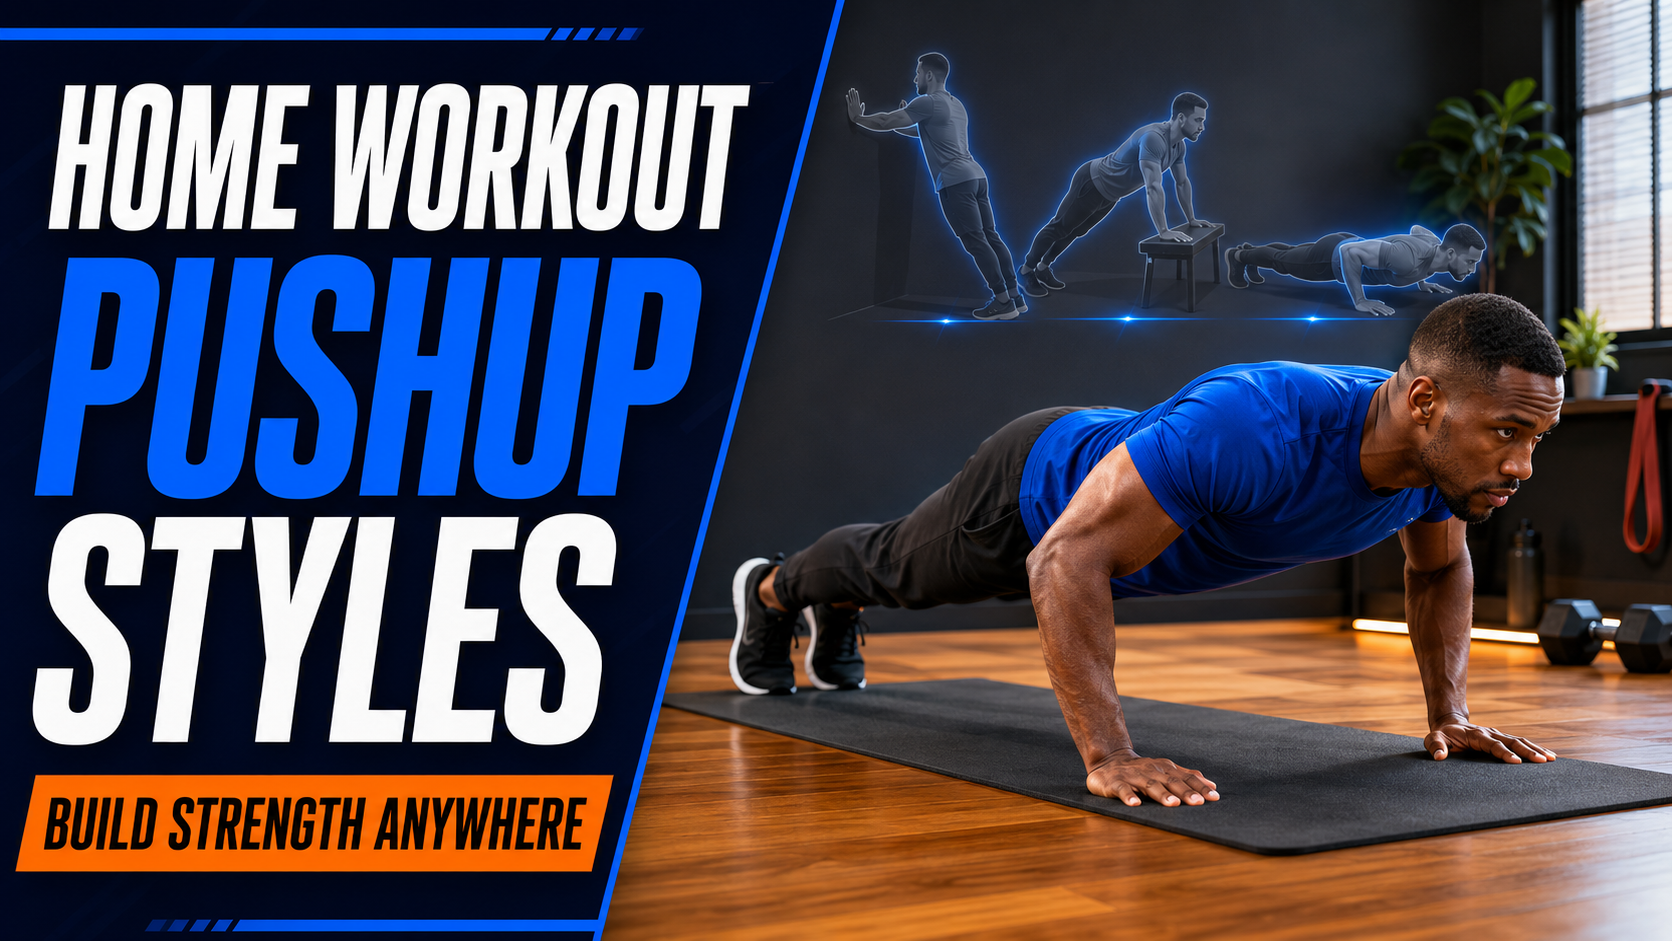
Pushup stylePrimary purposeDifficultyWall pushupLearn alignment with minimal upper-body loadBeginnerCountertop or incline pushupBuild strength toward floor pushupsBeginnerBent-knee pushupReduce resistance while practicing floor mechanicsBeginner–intermediateStandard pushupDevelop chest, shoulder, triceps and core strengthIntermediateClose-grip pushupIncrease emphasis on the tricepsIntermediateWide-hand pushupChanges chest and shoulder demandsIntermediatePause pushupBuild control by holding near the bottomIntermediateTempo pushupIncrease time under tension with a slow descentIntermediate–advancedDecline pushupIncrease upper-body load by elevating the feetAdvancedPlyometric pushupDevelop explosive pressing powerAdvanced
1. Wall pushup
Stand facing a wall and place your hands around chest height. Walk your feet backward, keep your body straight and lower your chest toward the wall.
This is an excellent starting point for beginners, older adults or people rebuilding strength. The American Academy of Orthopaedic Surgeons includes wall pushups among basic shoulder-strengthening movements, although anyone recovering from an injury should follow the recommendations of their clinician. AAOS
2. Incline pushup
Place your hands on a stable counter, bench or heavy piece of furniture that cannot slide. The higher the surface, the easier the exercise.
Incline pushups are often a better progression than struggling through poorly controlled floor repetitions. Gradually lower the surface as strength improves.
3. Bent-knee pushup
Begin on your hands and knees, then move the knees backward until the body forms a straight line from the head through the knees.
Avoid bending sharply at the hips. The chest and hips should still move together. ACE Fitness
4. Standard pushup
The standard version provides a strong combination of upper-body resistance and core stabilization. Progress only when you can maintain alignment through the complete set.
5. Close-grip pushup
Place the hands closer together and keep the elbows near the torso. This increases the challenge to the triceps.
The hands do not need to form a perfect diamond. Choose a position that allows the wrists and shoulders to remain comfortable.
6. Wide-hand pushup
Position the hands wider than in a standard pushup. This changes the distribution of muscular effort, but wider is not automatically better.
Avoid placing the hands so far apart that the shoulders feel strained or the movement becomes shallow.
7. Pause pushup
Lower under control and hold briefly near the bottom before pressing upward. The pause removes momentum and exposes weaknesses in positioning.
Start with one-second pauses rather than attempting long holds.
8. Tempo pushup
Use a three- to five-second descent, pause briefly and return at a normal controlled speed.
Tempo training makes a basic pushup harder without adding weight. It can also help athletes develop greater awareness of body position.
9. Decline pushup
Elevate the feet on a stable surface while keeping the hands on the floor. This shifts more body weight toward the arms and increases the upper-body demand.
A kinetic analysis of pushup variations found that elevating the feet increases the vertical force placed through the upper extremities, while elevating the hands reduces it. PubMed
10. Plyometric pushup
Lower normally, then push forcefully enough for the hands to leave the floor. Advanced versions include clap pushups, but a clap is not necessary to develop power.
This variation places greater stress on the wrists, elbows and shoulders. It is intended for experienced exercisers who already have strong standard pushup mechanics.
How to progress without rushing
The safest progression is not based on a calendar. It is based on movement quality.
A practical sequence is:
- Wall pushups
- High-incline pushups
- Low-incline pushups
- Bent-knee pushups
- Standard pushups
- Tempo or paused pushups
- Decline or plyometric pushups
Move forward when you can complete two or three controlled sets without losing alignment or experiencing joint pain.
A beginner might start with 5–8 repetitions per set. Someone with more experience might use 8–15 repetitions. Stop the set when only one or two clean repetitions appear to remain.
The American College of Sports Medicine’s updated resistance-training guidance emphasizes that the biggest improvement occurs when people move from no resistance training to some consistent training. Programs should be individualized, gradually progressed and realistic enough to maintain. ACSM
A balanced 25-minute home workout
Pushups alone will not train the entire body. The following routine combines pushing, pulling, legs, hips and core work.
Warmup: four to five minutes
- March briskly in place
- Circle the shoulders gently
- Perform bodyweight good mornings
- Complete controlled squats
- Move through several easy wall pushups
Main circuit
Perform two or three rounds:
- Squats: 10–15 repetitions
- Incline or standard pushups: 5–15 repetitions
- Backpack rows: 8–15 repetitions
- Reverse lunges: 6–10 per leg
- Glute bridges: 10–15 repetitions
- Bird dogs or dead bugs: 6–10 per side
- Plank: 15–40 seconds
Rest for approximately 30–90 seconds when needed. Beginners can complete one round and gradually add volume.
For backpack rows, use a properly closed backpack containing a manageable amount of weight. Never use a bag with damaged straps or objects that can shift dangerously.
Finisher: three to five minutes
Choose one:
- Brisk marching
- Stair walking
- Low-impact jumping jacks
- Shadow boxing
- Jump rope
- Fast bodyweight squats followed by easy walking
A simple three-day schedule
Day 1: Foundation
- Squats
- Incline pushups
- Backpack rows
- Glute bridges
- Dead bugs
Day 2: Control
- Reverse lunges
- Tempo pushups
- One-arm backpack rows
- Calf raises
- Side planks
Day 3: Endurance
- Bodyweight squats
- Standard or bent-knee pushups
- Backpack rows
- Alternating glute bridges
- Bird dogs
- Short cardio intervals
Separate harder strength sessions with recovery days when possible. Walking and gentle mobility work can still be performed between strength workouts.
Safety comes before intensity
Warm up with approximately 5–10 minutes of light movement before harder exercise. Move in a controlled manner and avoid using momentum to force repetitions.
Pain is not proof that an exercise is working. Muscle fatigue and mild exertion are expected; sharp, sudden or worsening pain is a reason to stop.
Mayo Clinic recommends warming up, using controlled movement, avoiding excessive volume and stopping exercises that produce pain. Mayo Clinic
Speak with a qualified health professional before beginning vigorous exercise if you have an existing heart condition, uncontrolled blood pressure, recent surgery, significant joint problems, unexplained chest symptoms or other medical concerns. The American Academy of Orthopaedic Surgeons recommends starting slowly and gradually increasing frequency, intensity and duration. AAOS
The real goal is consistency
Home exercise succeeds when it becomes a repeatable practice instead of a temporary punishment.
You do not need to perform every pushup variation. You need one variation that challenges you while allowing good form, a plan that trains the rest of the body and enough patience to progress gradually.
Start where you are. Record your repetitions. Improve the quality before increasing the quantity. A few focused sessions every week can build strength that carries into work, family life, recreation and long-term health.
Sources and full links
- CDC — Physical Activity Guidelines for Adults
https://www.cdc.gov/physical-activity-basics/guidelines/adults.html - U.S. Department of Health and Human Services — Physical Activity Guidelines for Americans
https://odphp.health.gov/our-work/nutrition-physical-activity/physical-activity-guidelines - Healthy People 2030 — Physical Activity Data and Objectives
https://odphp.health.gov/healthypeople/objectives-and-data/browse-objectives/physical-activity - American College of Sports Medicine — Updated Resistance-Training Guidelines
https://acsm.org/resistance-training-guidelines-update-2026/ - ACSM — Resistance Exercise for Health
https://acsm.org/resistance-exercise-health-infographic/ - American Council on Exercise — Standard Pushup Instructions
https://www.acefitness.org/resources/everyone/exercise-library/41/push-up/ - American Council on Exercise — Bent-Knee Pushup Instructions
https://www.acefitness.org/resources/everyone/exercise-library/13/bent-knee-push-up/ - PubMed — Muscle Activation During Conventional Pushups
https://pubmed.ncbi.nlm.nih.gov/20664364/ - PubMed — Kinetic Analysis of Pushup Variations
https://pubmed.ncbi.nlm.nih.gov/21873902/ - Mayo Clinic — Weight Training Technique and Safety
https://www.mayoclinic.org/healthy-lifestyle/fitness/in-depth/weight-training/art-20045842 - American Academy of Orthopaedic Surgeons — Safe Exercise
https://orthoinfo.aaos.org/en/staying-healthy/safe-exercise/ - American Academy of Orthopaedic Surgeons — Basic Shoulder Strengthening and Wall Pushups
https://orthoinfo.aaos.org/en/diseases--conditions/common-shoulder-injuries/
This article provides general educational information and is not a substitute for individualized medical or physical-therapy advice.